Disclaimer, I am not a professional of any sort, I’m learning along side everyone else as I practice these topics to improve my own art. This is not a full “tutorial” either, just basics of the human skull in art and small tips.
If you draw humans or humanoid characters, regardless of art style, learning the skull anatomy will help you improve in many areas from general placement to helping with eyeball angles when it comes to drawing the head. If you don’t know the rules; its difficult to make stylistic exaggerations still look correct. Rules are there for a reason and if you understand why it exists you can build on top of reality to create your own take. Of course if you want a style based more on reality you should know anatomy a ton better.
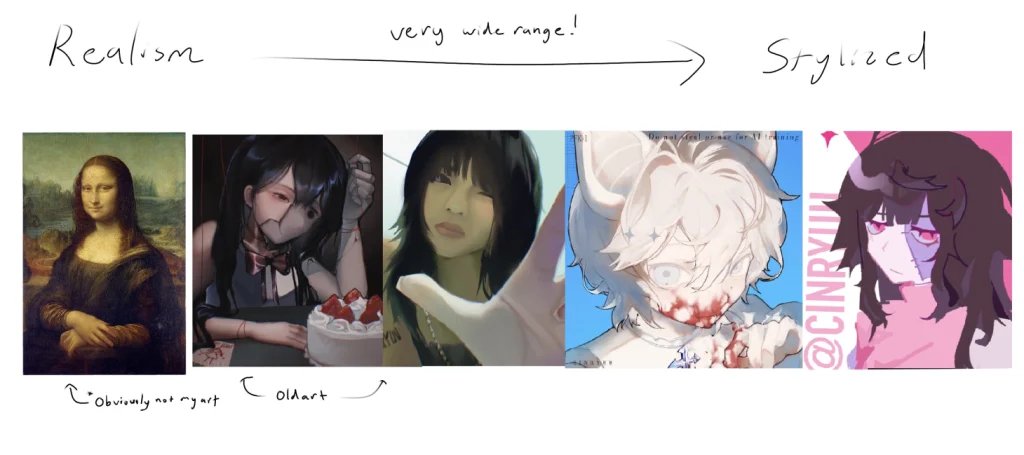
(Examples aren’t the greatest sorry. Majority are old/from last year as I rarely draw semi-realism and if I do it is traditional art for school.)
Parts of the Skull
Anteriro nasal spine… vomer… all the sutures and ridges of the skull. Too much work! you don’t need to memorize or know every single specific detail (Unless you want to for medical reasons or do hyper-realism— in that case good luck to you.)
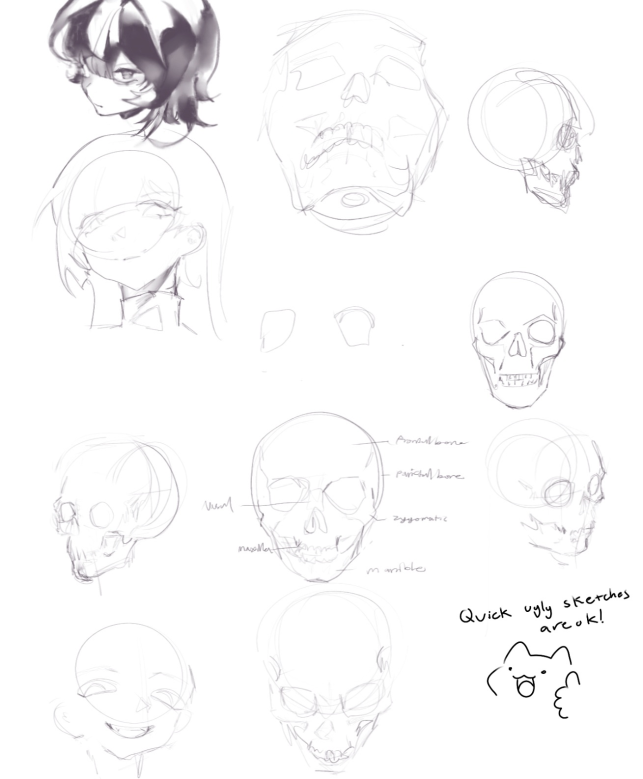
Complex details aside, I do think the general parts of facial and cranial bones are worth knowing such as:
- Orbital region (Eye sockets)
- Supraorbital (Brow ridge)
- Mandible & Maxilla (Jaw)
- Zygomatic (Cheek bones)
- Frontal/Parietal/Occipital (Forehead, sides of head, back of head)
Planes of the face
Facial expressions, lighting, and shadow are fixed around skin and muscle with are on top bone structure.
Below I will link some 3d models good for understanding the said planes of the face.
Resources:
https://www.artstation.com/artwork/GX3Ax1
https://www.artstation.com/artwork/KOgZoo (Asaro Planes of the Head)
Practicing skull anatomy
Drawing is something you pick up from awareness. The shape of the object in 3d space, why it distorts in such a way, why light falls here. The fastest way to improve is not only drawing in quantity but noting these small details alongside to weave into your next piece. Even if it looks bad you should continue on, finishing it and studying the reasons it “looks bad” teaches yourself so you don’t make the same mistakes again.
One way of practicing is just drawing and observing the skull in different angles. These should be quick sketches aiming for understanding.
Human Skull: Schemically Colored Bone Anatomy by The Center for BioMedical Visualization at SGU on Sketchfab
If you have trouble comprehending the 3d forms of the skull you can practice first with boxes, then put the skull inside it.

There’s no set routine that fits everyone, it depends on how much you want to improve whether it’s half an hour per day or an hour per week.
Just remember to try to stay disciplined; a 5 minute sketch every day is miles better than nothing.

Leave a Reply